How to format a hard disk in Windows
How to format a hard disk in Windows
This article contains instructions for initializing, partitioning, and formatting new hard disks and instructions for reformatting hard disks in Windows.
The instructions given in this article apply to versions of Windows 7, 8/8.1, and 10.
WARNING! Formatting means deleting all data on the hard disk. So, if you want to format the hard disk you've used, be sure to copy the file you want to see again to your computer or hard disk backup.
Format a New hard disk in Windows
1. To open Disk Management, press the Windows key + R
2. In the run box, type diskmgmt.msc, and then click OK
Note: If you're prompted to fill in an administrator password or confirmation, type a password or provide confirmation
3. Right-click the disk, and then select Disk Initialization
- Select a partition style
- MBR for hard disks under 2 TB
- GPT for hard disks above 2 TB
- Click OK
- The hard disk must be unfilled.
4. Right-click in the Unfilled box, and then select New Easy Volume
5. Click Next on the following command:
- Welcome to the Wizard
- Specify Volume Size
- Assign Hard Disk Letters or Paths
6. Select the File system
Use NTFS if you connect a storage device to a Windows computer, and you don't need to allow your Mac to write to a storage device.
Use exFAT if you need to allow Mac and Windows computers to read and write to storage devices.
7. You can customize the hard disk name by typing in the Volume Labels field
8. Click Next, and then Done
Reformat a hard disk in Windows
1. To open Disk Management, press the Windows key + R
2. In the run box, type diskmgmt.msc, and then click OK
Note: If you're prompted to fill in an administrator password or confirmation, type a password or provide confirmation
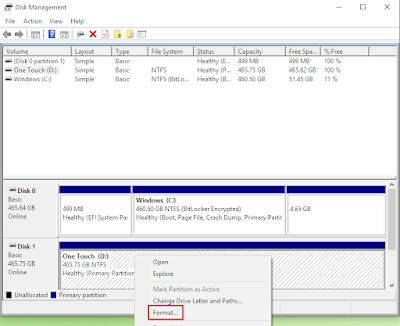
3. Right-click on the Partition box, and then choose Format
4. Format command will open
- You can customize the hard disk name by typing in the Volume Labels field
- Select File system
- Use NTFS if connect a storage device to a Windows computer, and you don't need to allow your Mac to write to a storage device.
- Use exFAT if you need to allow Mac and Windows computers to read and write to storage devices.
- Leave Allocation unit size as Default
- Quick format Do box must be checked
- Compress files and folders Enable must be Unchecked
- Click OK, and then click OK in the Formatting warning window
- Volume will display Formatting
- After a few seconds, the volume will display Health (Main Partition)
5. Klik tombol X untuk menutup Manajemen Disk
Reformat previously formatted for Mac hard disks in Windows
If the hard disk was previously formatted for Mac, Disk Management will list three partitions, one of which is called "Health (EFI System Partition)", which is a protected partition that you cannot delete.
To remove this partition, you must use the Microsoft Diskpart Erase Utility.
The following steps provide instructions for determining the disk number assigned to the hard disk and the Delete/Clean hard disk instructions using the Microsoft Diskpart Erase Utility.
Before proceeding, it's best to remove another hard disk from your computer. This will prevent the removal of the wrong hard disk and will help determine the disk number assigned to the hard disk you want to delete/ clean.
Steps to identify disk numbers in Disk Management
The image below shows how a hard disk formatted for Mac is listed in Disk Management and shows the hard disk number assigned
- Record the disk number.
Steps to Remove/Clean a hard disk using Diskpart Erase Utility
WARNING! Diskpart Erase/Clean will delete/destroy all data on the selected hard disk permanently. Make sure you delete the correct disk. Remove all additional hard disks from your computer, except the hard disk you want to remove.
1. To open the Command Prompt, press the Windows key + R
2. In the run box, type cmd, and then click OK
Note: If you're prompted to fill in an administrator password or confirmation, type a password or provide confirmation
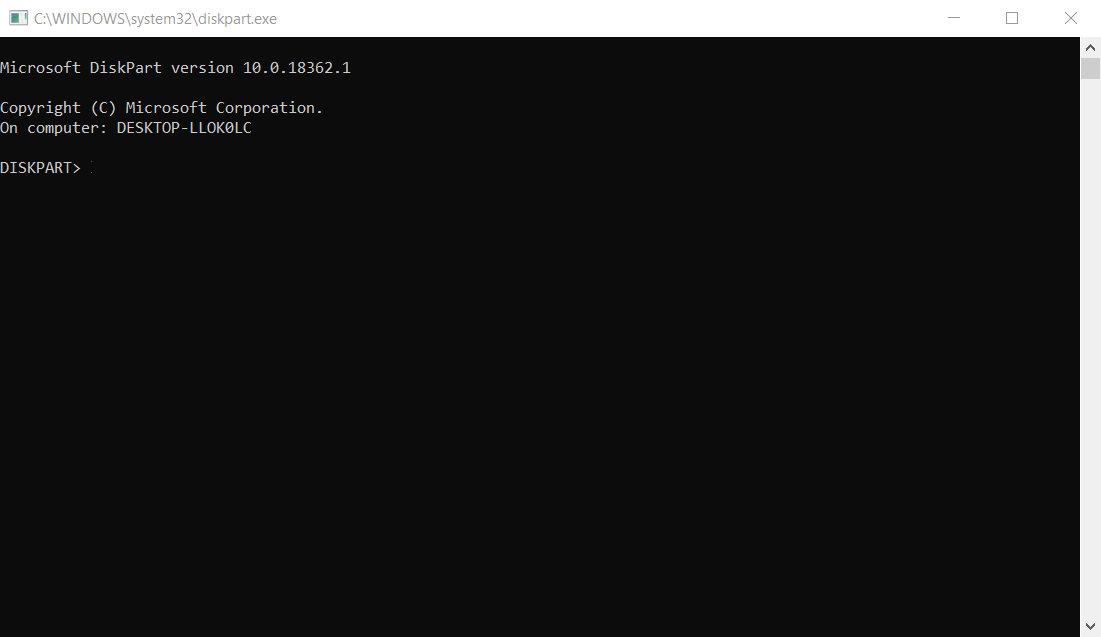
3. The Command Prompt window will open
4. Type diskpart, and then press Enter > diskpart command will open
5. Type disk list, and then press Enter
6. Disk list will be displayed
7. Type select disk X (select disk X) (replace the letter X with the disk number assigned to the hard disk)
8. The Command Prompt displays the message "Disk 1 is the selected disk."
9. Type clean, and then press Enter
10. Command Prompt displays the message "DiskPart succeeded cleaning the disk"
11. Click the X button to close the Command Prompt
Now the hard disk can be initialized, partitioned, and formatted by following the instructions under section - Format a new hard disk in Windows.
For additional information, visit the Microsoft Support Knowledge Base.
Hopefully, this article about How to format a hard disk in Windows, gives you a little insight. Also, read an article about How to format an APFS hard disk on macOS 11 (Big Sur) and later that you may need to know. Thank you.


